.JPG)
Venice water bus model kit.
Guarda le realizzazioni dei clienti |
|
|
|
Ecco il nuovo kit di costruzione di un
"motoscafo" veneziano dell'Actv, utilizzato nelle linee
circolari attorno a Venezia.
Here is the new construction
kit for an Actv Venetian "motoscafo," used on the
circular lines around Venice.
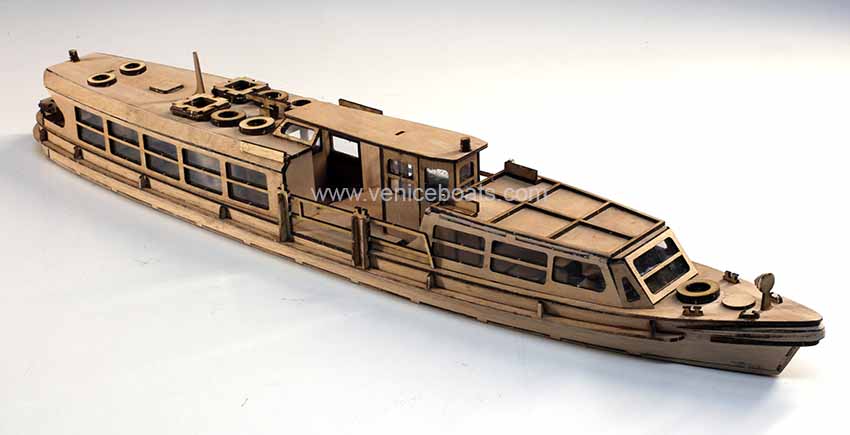
Il kit permette di costruire un
vaporetto veneziano del tipo denominato "Motoscafo"
o M-S in scala 1:45 (ca). Il modello finito è
lungo 48 cm per 8,5 cm di larghezza. E' composto di
278 pezzi
(circa) di compensato marino di okumè da 1,7 mm. Per la
sua costruzione è necessario solo colla vinilica e
colori acrilici o di altro tipo (non compresi nel kit).
The kit allows you to build a
Venetian vaporetto of the "Motoscafo" or M-S type in
1:45 scale (approximately). The finished model is 48 cm
long and 8.5 cm wide. It is made of approximately 278
pieces of 1.7 mm okoume marine plywood. All you need to
build it is PVA glue and acrylic or other paints (not
included in the kit).
prezzo price 70€
Cari clienti non facciamo più
spedizioni. Ci dispiace. Gli acquisti si possono fare
solo in bottega
Dear customers we no longer ship.
Sorry. Purchases can only be made in the shop
|
|
Guarda le realizzazioni dei clienti |
.JPG) |
|
|
.JPG) |
|
|
.JPG) |
|
|
|
|
.JPG) |
|
|
|
|
.JPG) |
|
Fasi di
costruzione Construction phases |
 |
|
|
.jpg) |
|
Il kit finito a legno naturale. The
kit finished in natural wood. |
.jpg) |
|
|
.jpg) |
|
|
|
Le
vostre realizzazioni |
|
Istruzioni - Direction |
|
|
 |
|
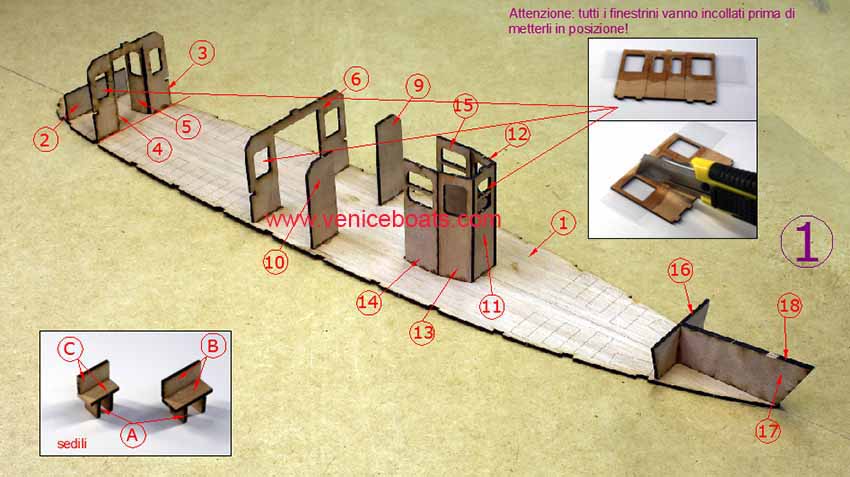
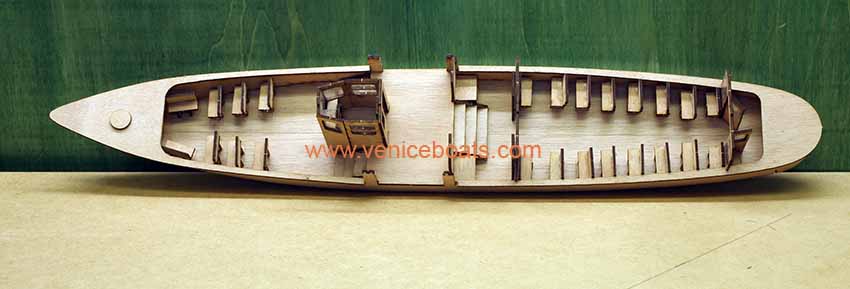
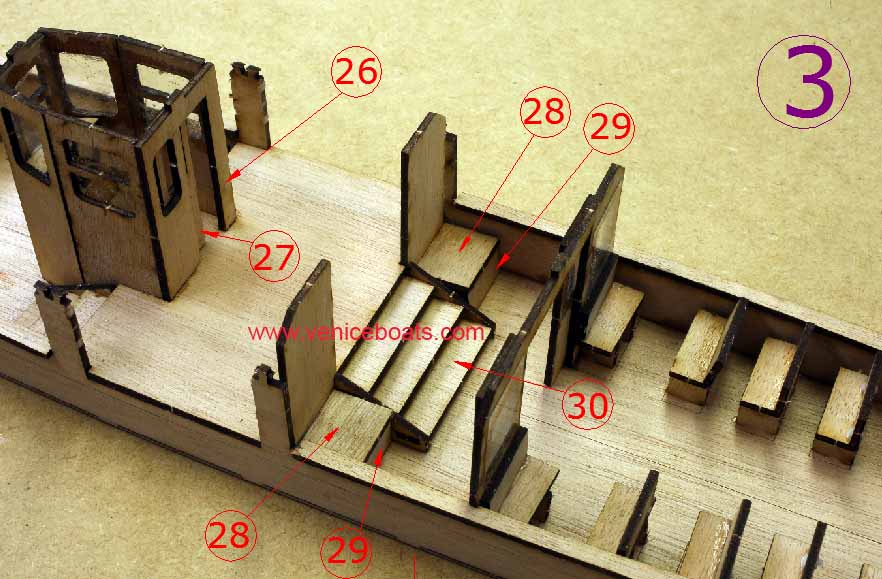
Nel montaggio seguire la sequenza dei
numeri. Inserire le paratoie centrali e di poppa con le porte come
da fotografia. Le porte sono lasciate a legno naturale o
vernice trasparente.
Per prima cosa si deve incollare il film trasparente
sulle varie finestre. Questo è più grande perché andrà
rifilato dopo l'incollaggio.
Si devono preparare anche i
sedili, ricordandosi che i 4 del tipo "C" sono gli
ultimi di poppa. In questa fase si possono dipingere di
azzurro. When assembling,
follow the sequence of numbers. Insert the central and
stern bulkhead with the doors as shown in the photo. The
doors are left natural wood or clear coated.
First, glue the transparent film to the various windows.
This one is larger because it will be trimmed after
gluing.
The seats must also be prepared, remembering that the
four "C" type seats are the last ones at the stern. At
this stage, they can be painted blue. |
|
|

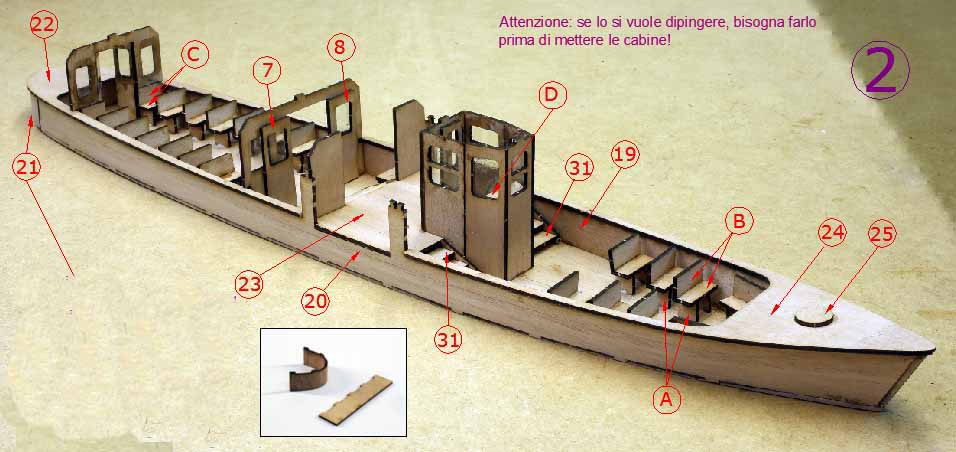
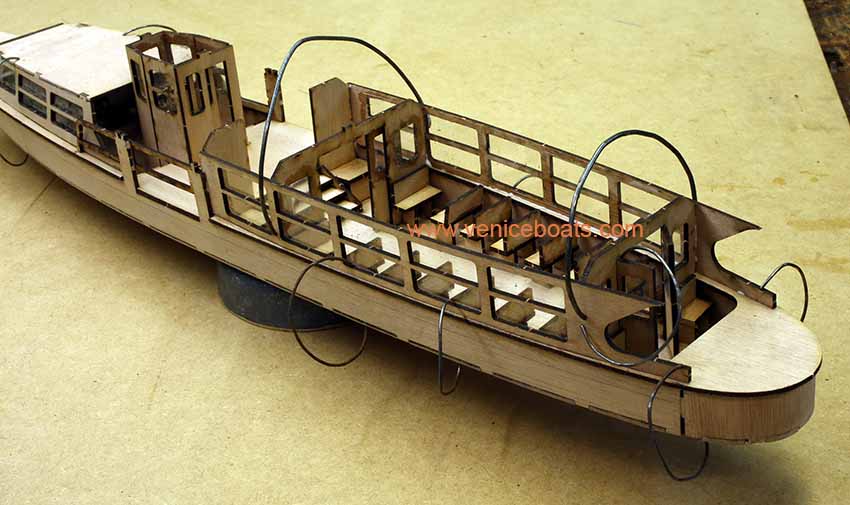
Si consiglia di incollare i fianchi partendo dal centro
per mantenere in fondo diritto. It is recommended to
glue the sides starting from the center to keep the
bottom straight. |
|
|
 |
|
|
|
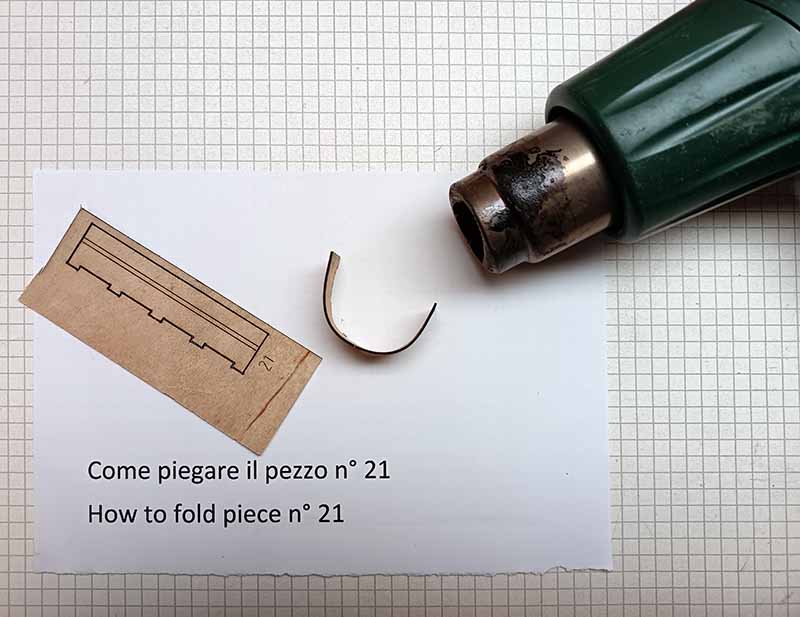 Nota: Per piegare il pezzo n° 21 bisogna inumidirlo con acqua
e riscaldarlo dolcemente con una fiamma o un phon ad
aria calda fino ad ottenere la forma desiderata. Nota: Per piegare il pezzo n° 21 bisogna inumidirlo con acqua
e riscaldarlo dolcemente con una fiamma o un phon ad
aria calda fino ad ottenere la forma desiderata.
Note: To fold the pieces n ° 21 you have to moisten them
with water and heat them gently with a hot
air gun until you get the desired shape |
|
|
|
|
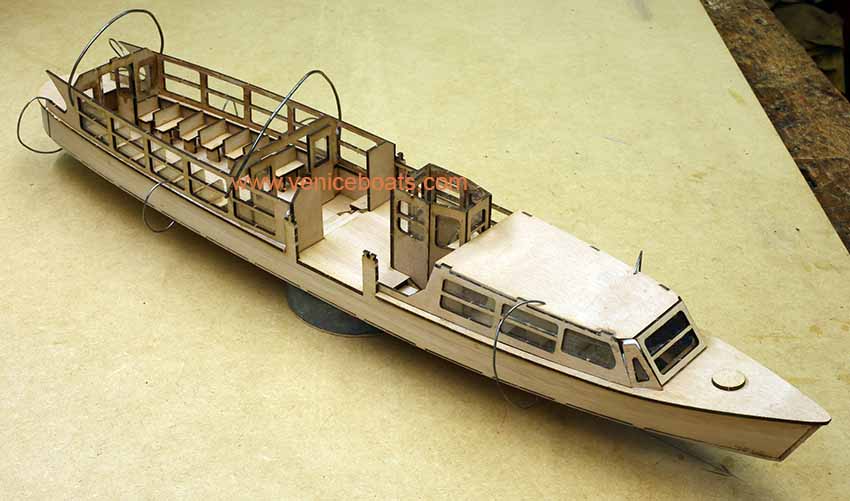
Lo scafo pronto per aggiungere le cabine.
The hull ready to add the cabins. |
|
|
%20w.jpg)
Naturalmente se volete dipingerlo gli interni andranno
colorati in questa fase prima di chiudere le cabine.
Of course if you want to paint it the interior will
have to be colored at this stage before closing the
cabins. |
%20w.jpg) |
|
|
w.jpg) |
|
|
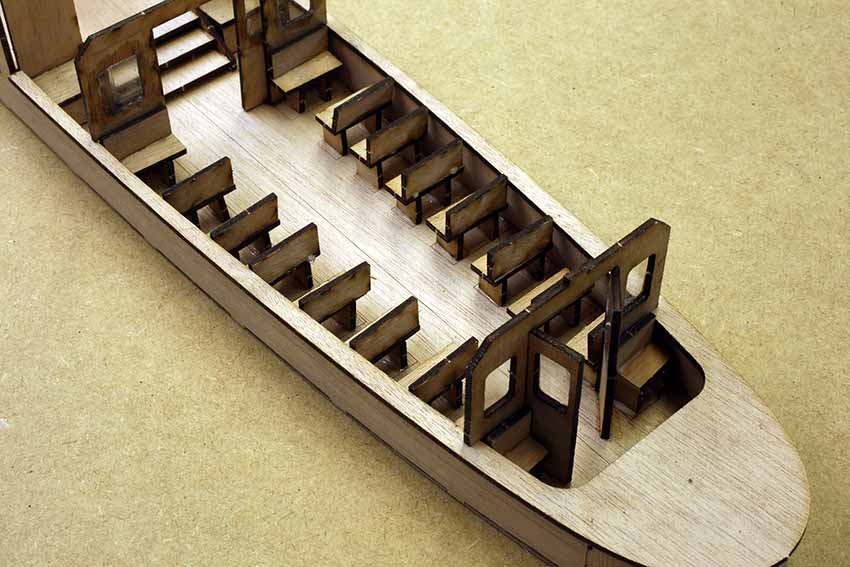
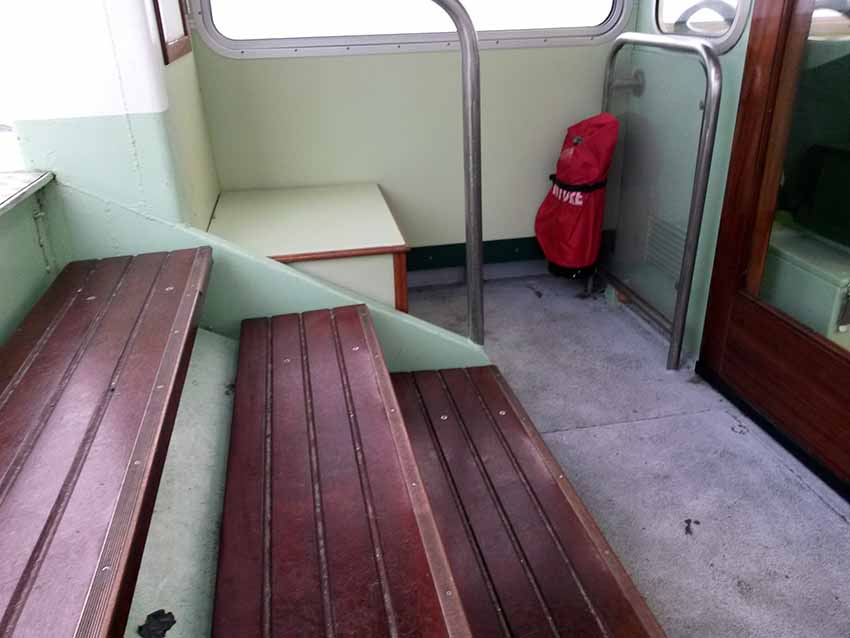
La parte poppiera completata con gli arredi interni e il
ponte.
The aft section completed with
interior furnishings and the deck. |
|
|
 Le panchine si
collocano
seguendo il segno inciso sul pavimento di compensato. La seduta e lo
schienale sono colorate di azzurro, mentre i due
fianchi di grigio come il ponte.
The benches are positioned following
the markings engraved on the plywood floor. The seat and
backrest are painted blue, while the two sides are gray,
matching the deck. |
|
|
 |
|
|
 |
|
|
|
|
.jpg) |
|
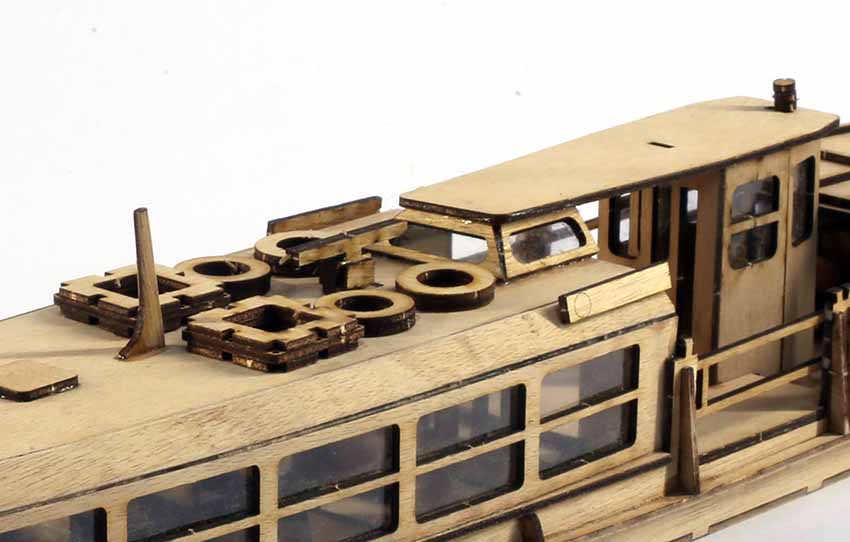
Alcuni dettagli della cabina
di pilotaggio. Some details of the cockpit. |
.jpg) |
.jpg) |
|
|
.jpg) |
|
|
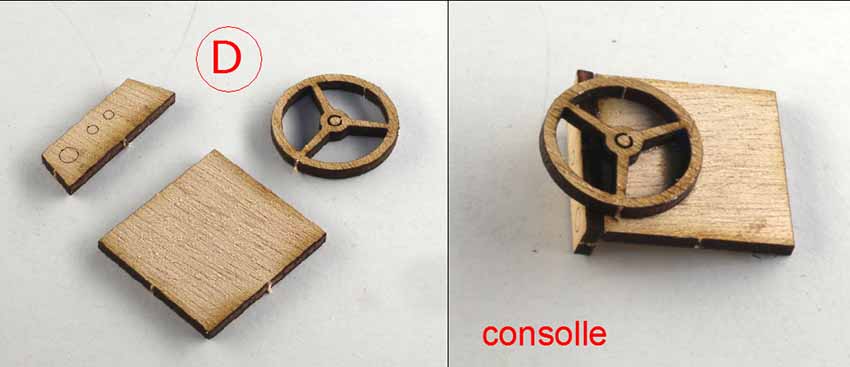
Completare la cabina di pilotaggio inserendo la consolle e
la ruota del timone.
Complete the cockpit by inserting
the console and steering wheel. |
|
|
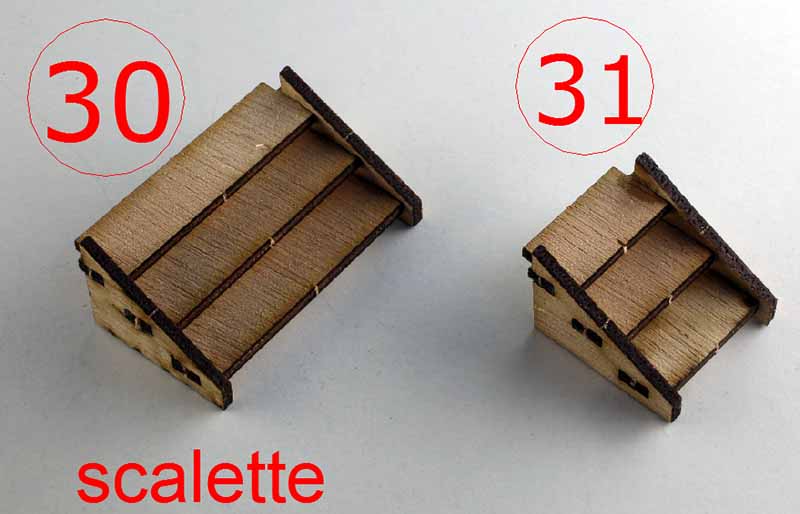
Scalette. Stair. |
|
|
 |
|
|
Fiancate della cabina di prua. Sides
of the forward cabin.
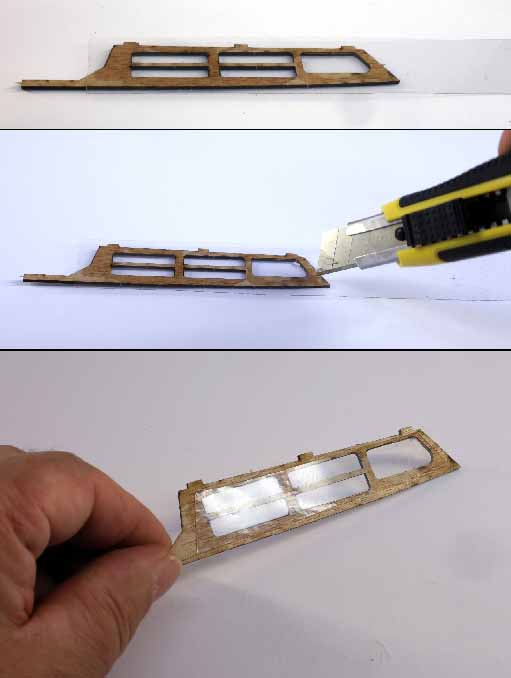
Incollare le strisce intere di acetato
sul rovescio delle fiancate e delle cabine, con un filo
di colla vinilica o rapida, e lasciarlo asciugare con un
po' di pressione uniforme. Quando sarà asciutta tagliare
le varie parti sul segno già presente nel compensato.
Glue the entire acetate strips to
the back of the sides and cabins with a little PVA or
superglue and let it dry, applying even pressure. Once
dry, cut the various pieces along the pre-marked lines
on the plywood. |
|
|
Incollaggio delle fiancate della cabina di poppa.
Gluing the sides of the aft cabin. |
|
|
Incollaggio del tetto di prua.
Gluing the bow roof. |
|
|
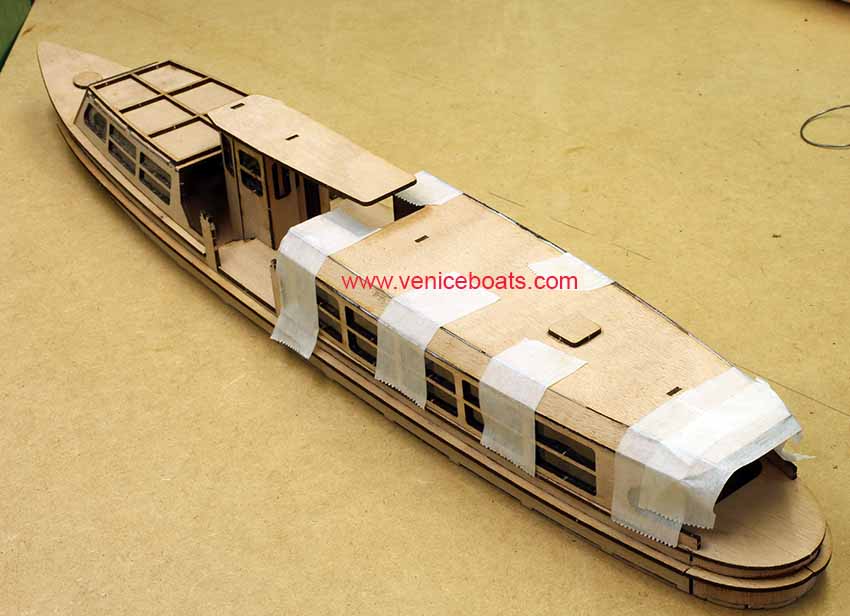
Incollaggio del tetto di poppa.
Gluing the aft roof. |
|
|
 |
|
|
|
|
 |
|
Dopo aver incollato i fianchi
della cabina di poppa (n° 32 e 33) si mette il tetto (n°
34) e per ultimo le due fasce spioventi (35 e 36).
After gluing the sides of the aft
cabin (n° 32 and 33) the roof is placed (n° 34) and
finally the two sloping bands (35 and 36). |
|
|
 |
|
|
|
|
 |
|
|
 |
|
|
 |
|
|
|
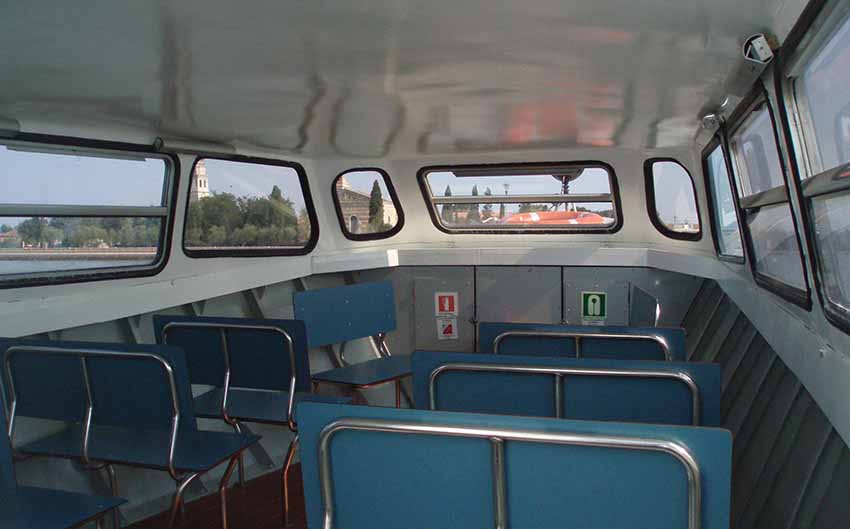
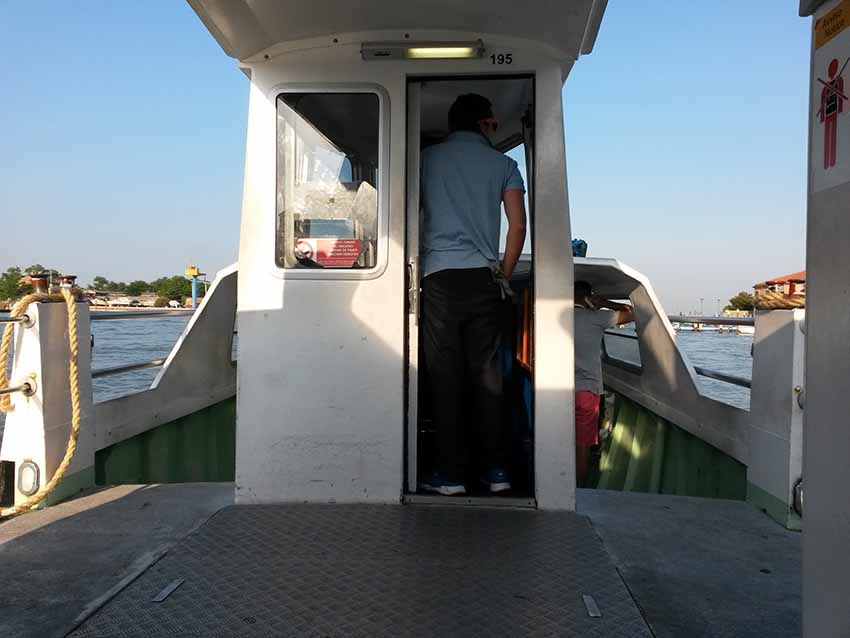
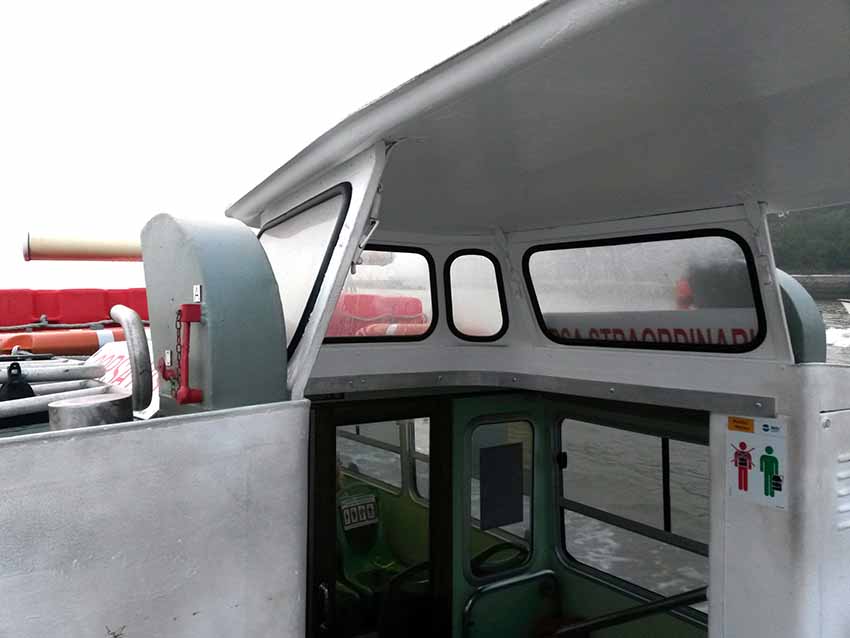
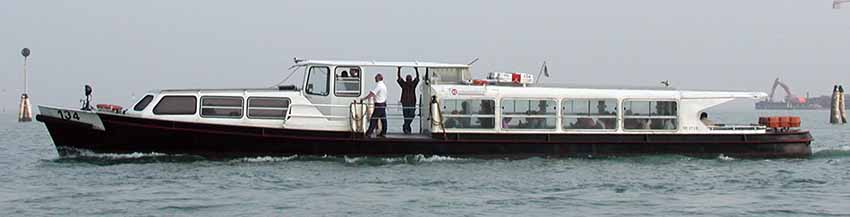
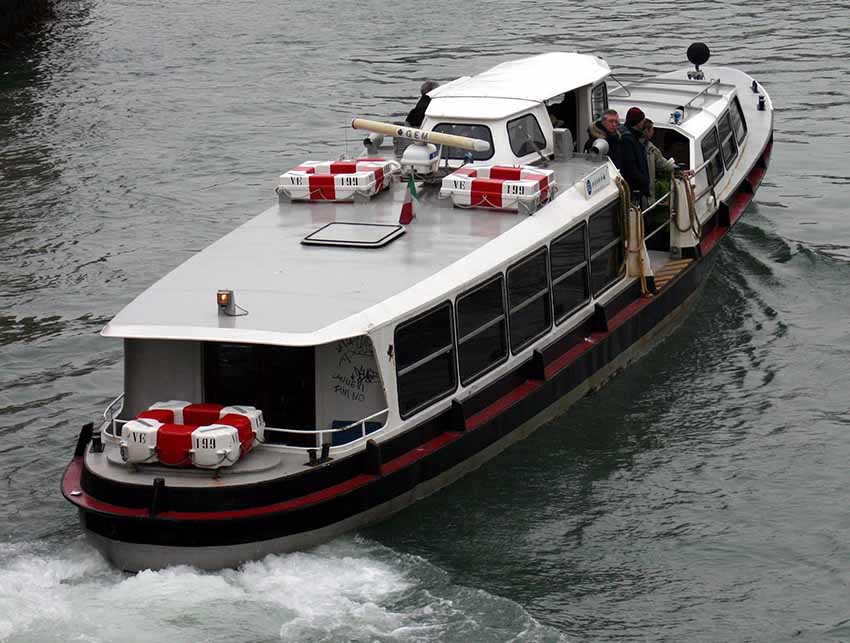
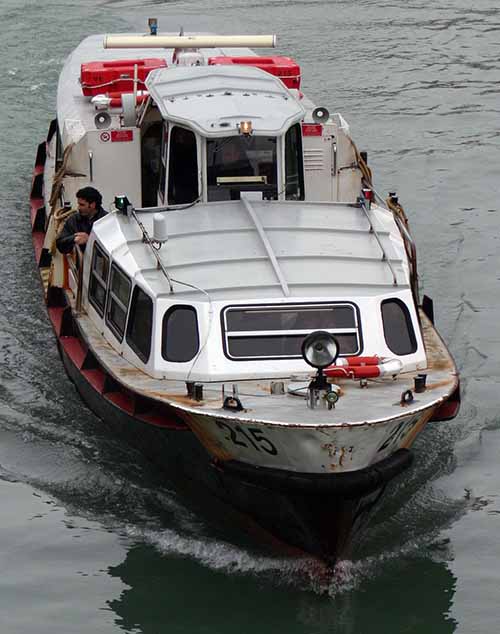
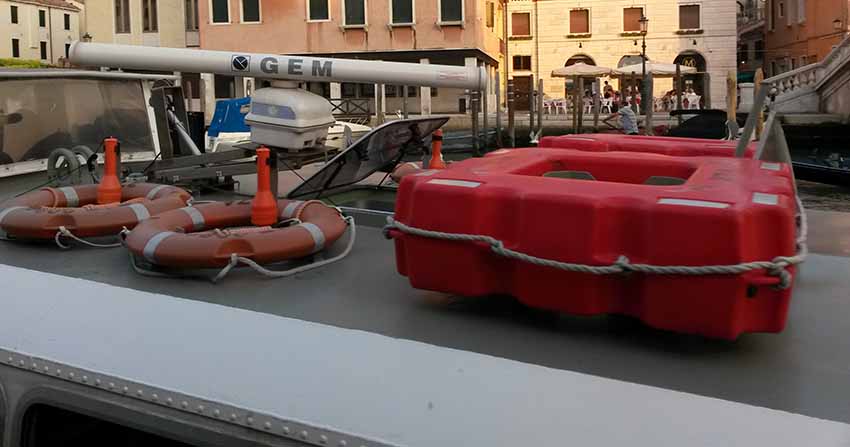
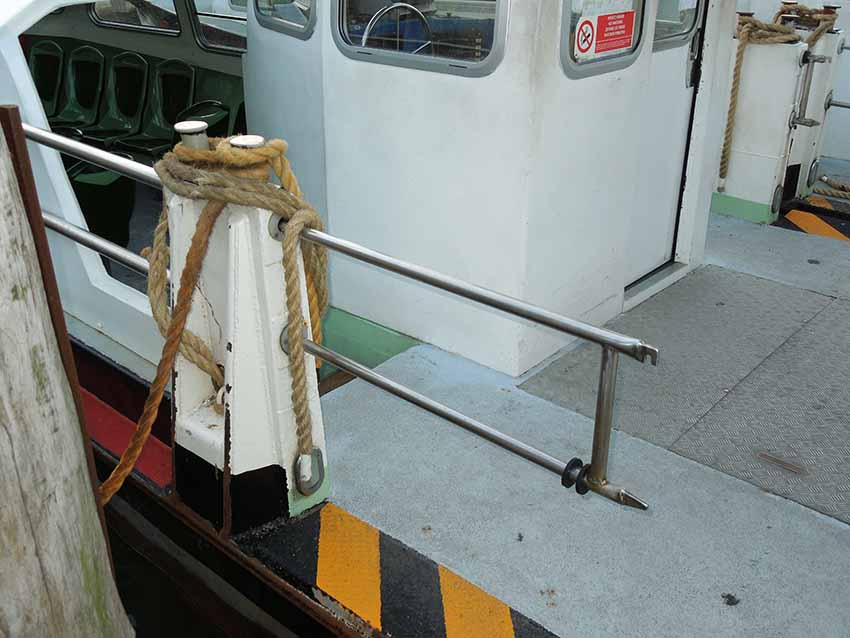
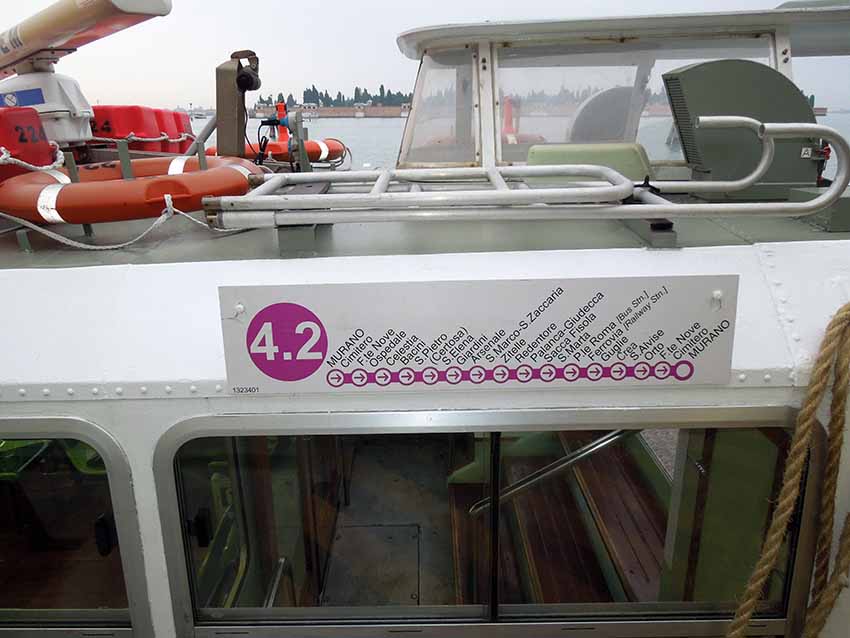
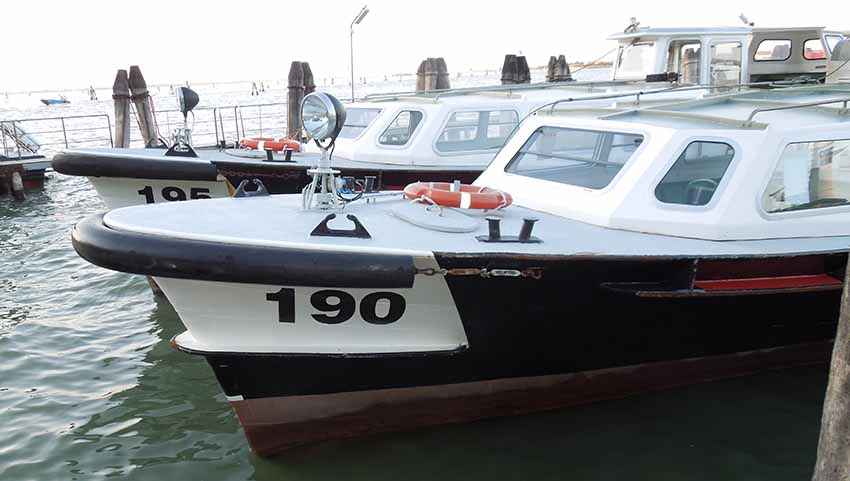
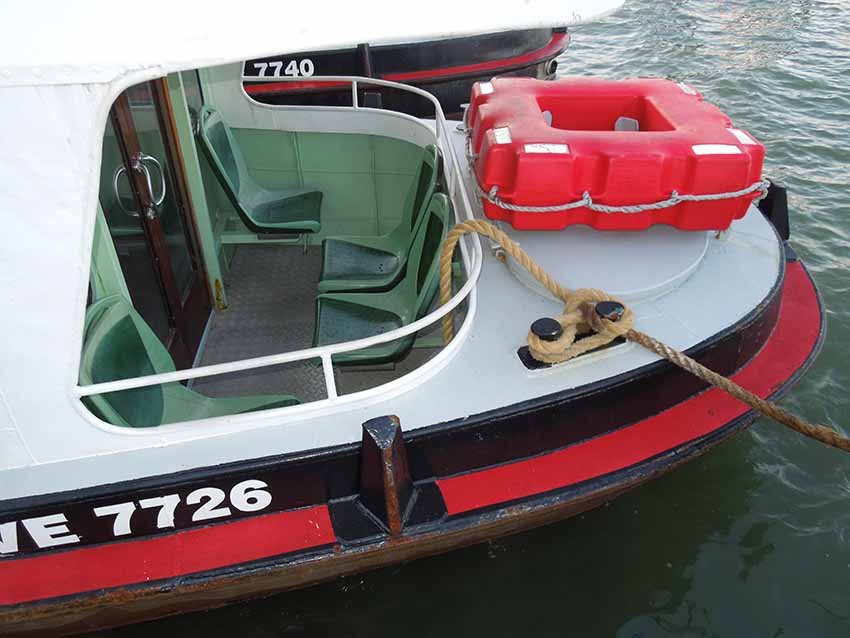
Ecco alcune immagini dei motoscafi per poterne
trarre i dettagli costruttivi.
Here are some pictures of the
motorboats to help you understand their construction
details. |
|
|
 |
|
|
|
|
 |
|
|
|
|
 |
|
|
 |
|
|
|
Il giardinetto. |
 |
|
Guarda le realizzazioni dei clienti |
|
|
|
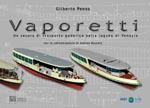
Maggiori informazioni sui vaporetti
veneziani sono contenuti nel nostro libro: Vaporetti
- un secolo di trasporto pubblico nella laguna di Venezia.
More information on Venetian
vaporetti is contained in our book: Vaporetti - a
century of public transport in the Venetian lagoon.
Guarda dentro
|
|
|
|